以前試過做一些 UI 是 TextView 旁邊有一個 icon,然後同一行最右邊會有另一個 Button。如果文字過長就加上省略號,但文字不夠長的話 icon 要緊貼那個文字而那個 Button 就固定在右邊。TextView 有 compound drawable,但如果想那個 icon 有 click listener 又用不了。所以最後都要分開 TextView 和 ImageView/ImageButton 兩個 view。
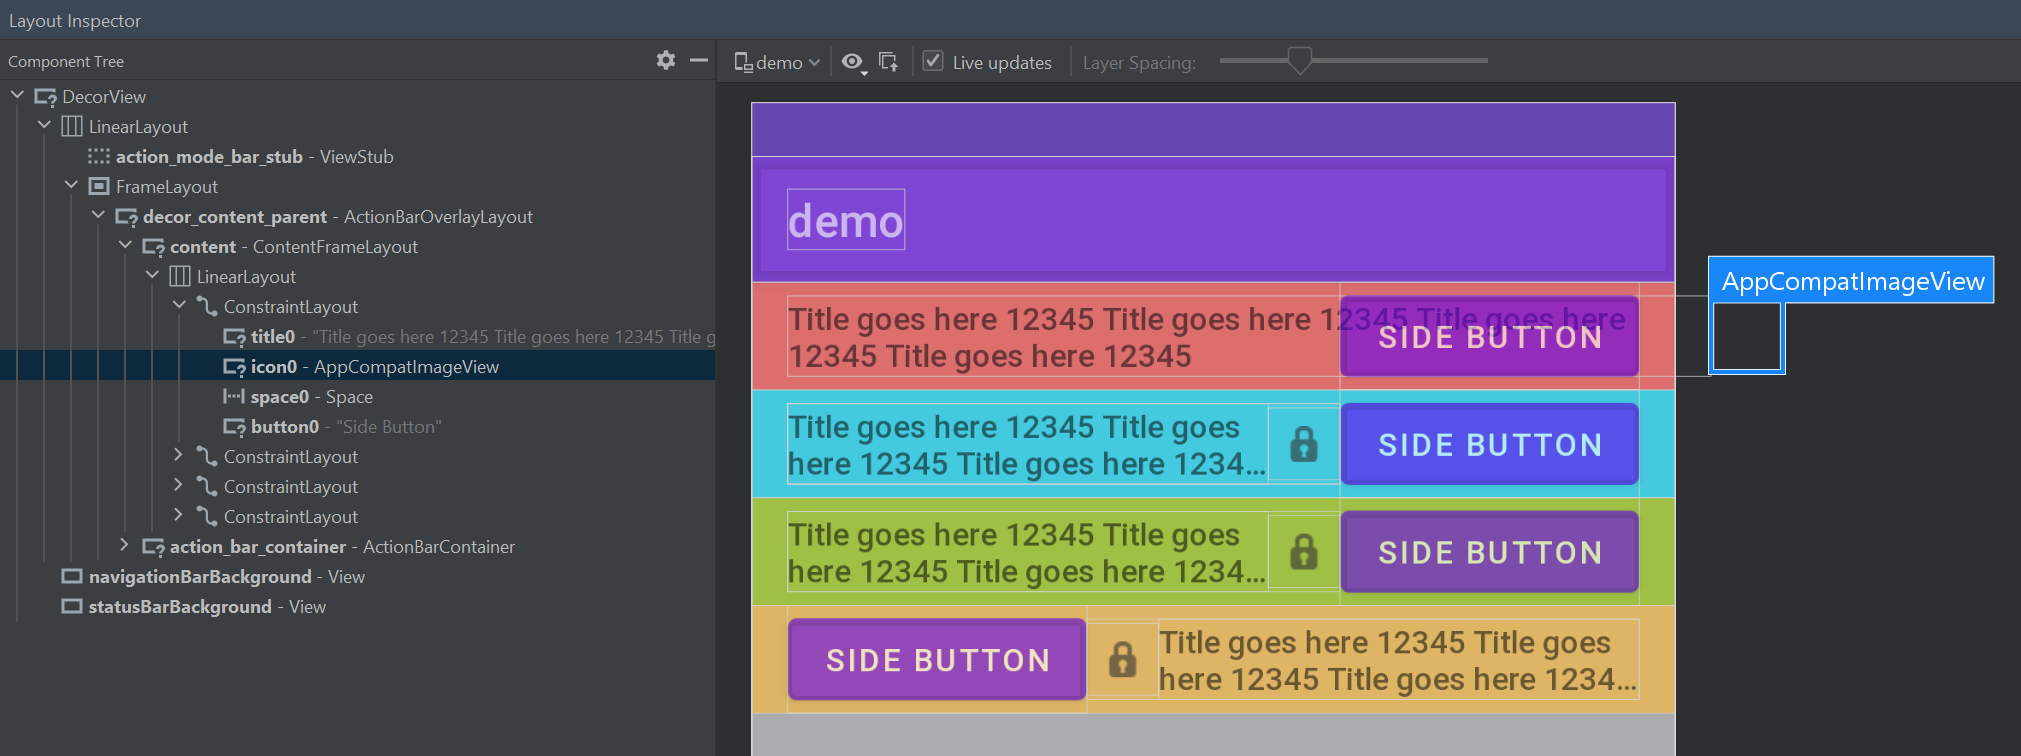
失敗例子:ConstraintLayout horizontal chain
<androidx.constraintlayout.widget.ConstraintLayout
    android:layout_width="match_parent"
    android:layout_height="wrap_content"
    android:background="@android:color/holo_red_light">

    <TextView
        android:id="@+id/title0"
        android:layout_width="wrap_content"
        android:layout_height="wrap_content"
        android:layout_marginStart="16dp"
        android:ellipsize="end"
        android:maxLines="2"
        android:text="@string/testing"
        android:textAppearance="@style/TextAppearance.AppCompat.Body2"
        app:layout_constraintBottom_toBottomOf="parent"
        app:layout_constraintEnd_toStartOf="@id/icon0"
        app:layout_constraintHorizontal_bias="0.5"
        app:layout_constraintHorizontal_chainStyle="packed"
        app:layout_constraintStart_toStartOf="parent"
        app:layout_constraintTop_toTopOf="parent" />

    <ImageView
        android:id="@+id/icon0"
        android:layout_width="wrap_content"
        android:layout_height="wrap_content"
        android:contentDescription="@null"
        android:padding="8dp"
        android:src="@android:drawable/ic_secure"
        app:layout_constraintBottom_toBottomOf="parent"
        app:layout_constraintEnd_toStartOf="@+id/space0"
        app:layout_constraintHorizontal_bias="0.5"
        app:layout_constraintStart_toEndOf="@id/title0"
        app:layout_constraintTop_toTopOf="parent" />

    <Space
        android:id="@+id/space0"
        android:layout_width="0dp"
        android:layout_height="0dp"
        app:layout_constraintBottom_toBottomOf="parent"
        app:layout_constraintEnd_toStartOf="@id/button0"
        app:layout_constraintHorizontal_weight="1"
        app:layout_constraintStart_toEndOf="@id/icon0"
        app:layout_constraintTop_toTopOf="parent" />

    <Button
        android:id="@+id/button0"
        android:layout_width="wrap_content"
        android:layout_height="wrap_content"
        android:layout_marginEnd="16dp"
        android:text="@string/button"
        app:layout_constraintBottom_toBottomOf="parent"
        app:layout_constraintEnd_toEndOf="parent"
        app:layout_constraintStart_toEndOf="@id/space0"
        app:layout_constraintTop_toTopOf="parent" />
</androidx.constraintlayout.widget.ConstraintLayout>
上面是果單純用 ConstraintLayout 配搭 horizontal chain。Space 的作用就是為了逼 ImageView 和 TextView 緊貼在一起。但如果文字過長就會出界,做不到期望的效果。
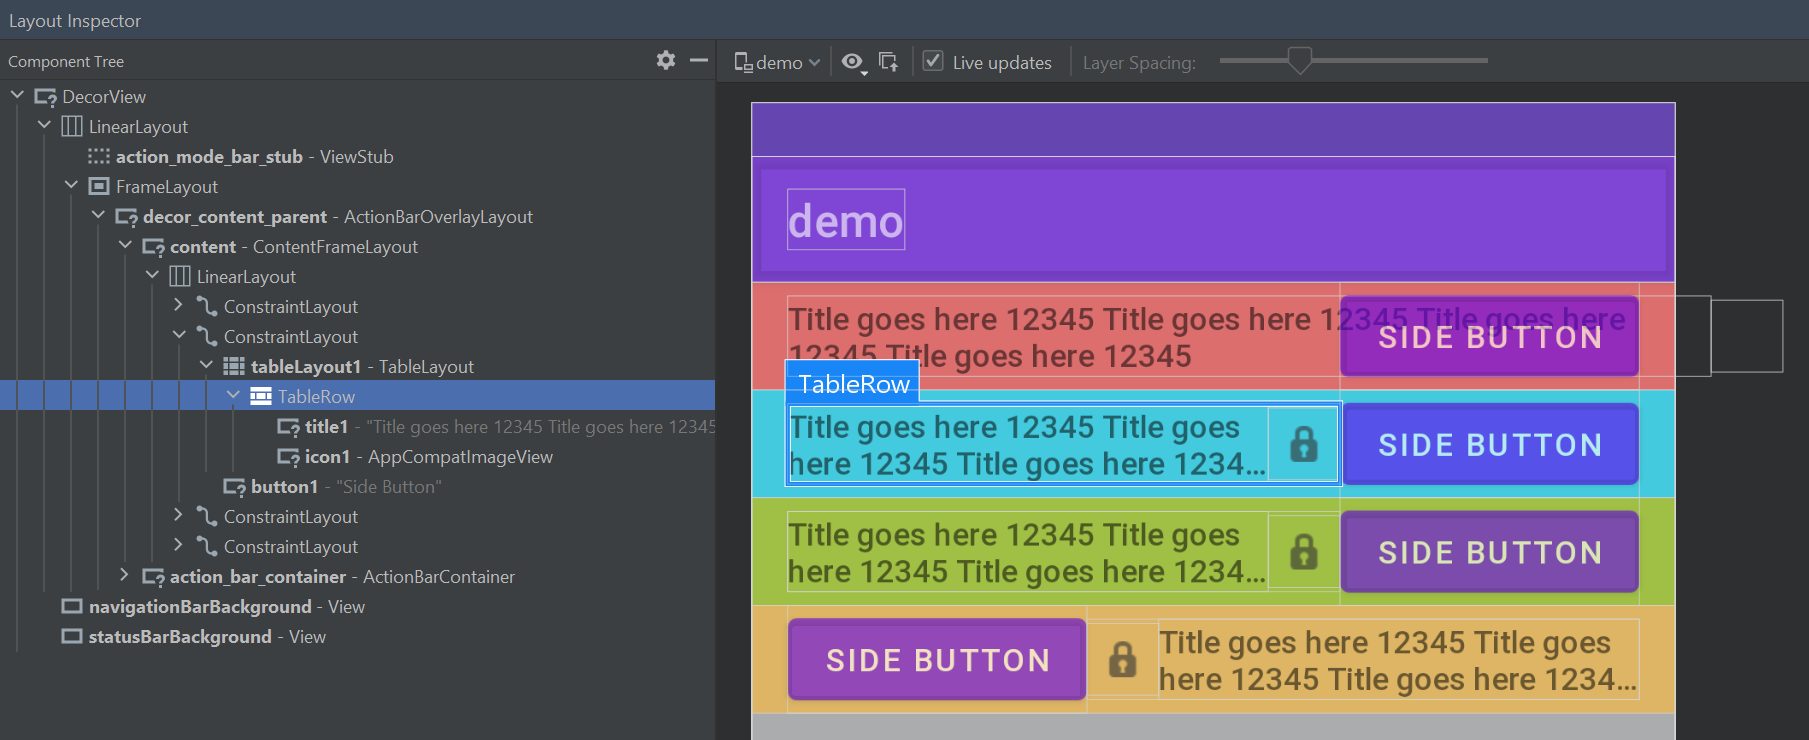
TableLayout 加 TableRow
在 ConstraintLayout 還未出 2.0 的時候試過用 TableLayout 加 TableRow 包住 TextView 和 ImageView 來做到 icon 緊貼文字的效果,但就令 layout hierarchy 加深。加上外面本來就是用 ConstraintLayout 排版,再加個 TableLayout 就失去了用 ConstraintLayout 扁平化 layout hierarchy 的意義。
<androidx.constraintlayout.widget.ConstraintLayout
    android:layout_width="match_parent"
    android:layout_height="wrap_content"
    android:background="@android:color/holo_blue_bright">

    <TableLayout
        android:id="@+id/tableLayout1"
        android:layout_width="0dp"
        android:layout_height="wrap_content"
        android:layout_marginStart="16dp"
        android:shrinkColumns="0"
        app:layout_constraintBottom_toBottomOf="parent"
        app:layout_constraintEnd_toStartOf="@id/button1"
        app:layout_constraintHorizontal_chainStyle="spread"
        app:layout_constraintStart_toStartOf="parent"
        app:layout_constraintTop_toTopOf="parent">

        <TableRow
            android:layout_width="wrap_content"
            android:layout_height="wrap_content"
            android:gravity="center_vertical"
            tools:ignore="UselessParent">

            <TextView
                android:id="@+id/title1"
                android:layout_width="wrap_content"
                android:layout_height="wrap_content"
                android:ellipsize="end"
                android:maxLines="2"
                android:text="@string/testing"
                android:textAppearance="@style/TextAppearance.AppCompat.Body2" />

            <ImageView
                android:id="@+id/icon1"
                android:layout_width="wrap_content"
                android:layout_height="wrap_content"
                android:contentDescription="@null"
                android:padding="8dp"
                android:src="@android:drawable/ic_secure" />
        </TableRow>
    </TableLayout>

    <Button
        android:id="@+id/button1"
        android:layout_width="wrap_content"
        android:layout_height="wrap_content"
        android:layout_marginEnd="16dp"
        android:text="@string/button"
        app:layout_constraintBottom_toBottomOf="parent"
        app:layout_constraintEnd_toEndOf="parent"
        app:layout_constraintStart_toEndOf="@id/tableLayout1"
        app:layout_constraintTop_toTopOf="parent" />
</androidx.constraintlayout.widget.ConstraintLayout>
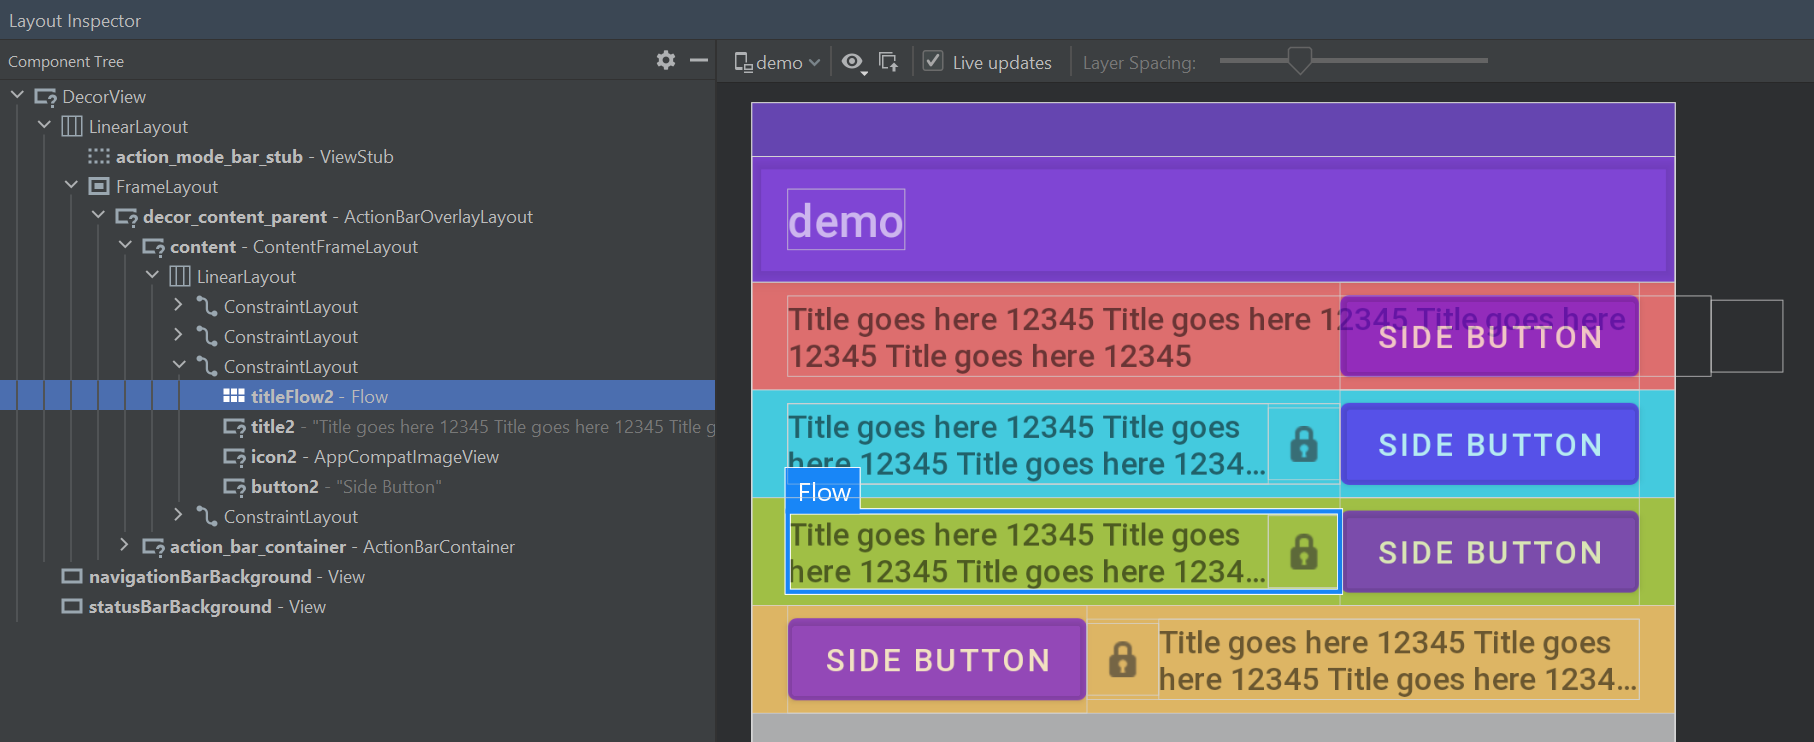
ConstraintLayout flow
ConstraintLayout 2.0 出了之後,多了 Flow 可以用,這樣就可以不需要用 TableLayout 了。這次的重點是 TextView 用了 app:layout_constrainedWidth="true",這樣 TextView 就不會出界。
<androidx.constraintlayout.widget.ConstraintLayout
    android:layout_width="match_parent"
    android:layout_height="wrap_content"
    android:background="@android:color/holo_green_light">

    <androidx.constraintlayout.helper.widget.Flow
        android:id="@+id/titleFlow2"
        android:layout_width="0dp"
        android:layout_height="wrap_content"
        android:layout_marginStart="16dp"
        app:constraint_referenced_ids="title2,icon2"
        app:flow_horizontalBias="0"
        app:flow_horizontalStyle="packed"
        app:flow_verticalAlign="center"
        app:layout_constraintBottom_toBottomOf="parent"
        app:layout_constraintEnd_toStartOf="@id/button2"
        app:layout_constraintHorizontal_chainStyle="spread"
        app:layout_constraintStart_toStartOf="parent"
        app:layout_constraintTop_toTopOf="parent" />

    <TextView
        android:id="@+id/title2"
        android:layout_width="wrap_content"
        android:layout_height="wrap_content"
        android:ellipsize="end"
        android:maxLines="2"
        android:text="@string/testing"
        android:textAppearance="@style/TextAppearance.AppCompat.Body2"
        app:layout_constrainedWidth="true" />

    <ImageView
        android:id="@+id/icon2"
        android:layout_width="wrap_content"
        android:layout_height="wrap_content"
        android:contentDescription="@null"
        android:padding="8dp"
        android:src="@android:drawable/ic_secure" />

    <Button
        android:id="@+id/button2"
        android:layout_width="wrap_content"
        android:layout_height="wrap_content"
        android:layout_marginEnd="16dp"
        android:text="@string/button"
        app:layout_constraintBottom_toBottomOf="parent"
        app:layout_constraintEnd_toEndOf="parent"
        app:layout_constraintStart_toEndOf="@id/titleFlow2"
        app:layout_constraintTop_toTopOf="parent" />
</androidx.constraintlayout.widget.ConstraintLayout>
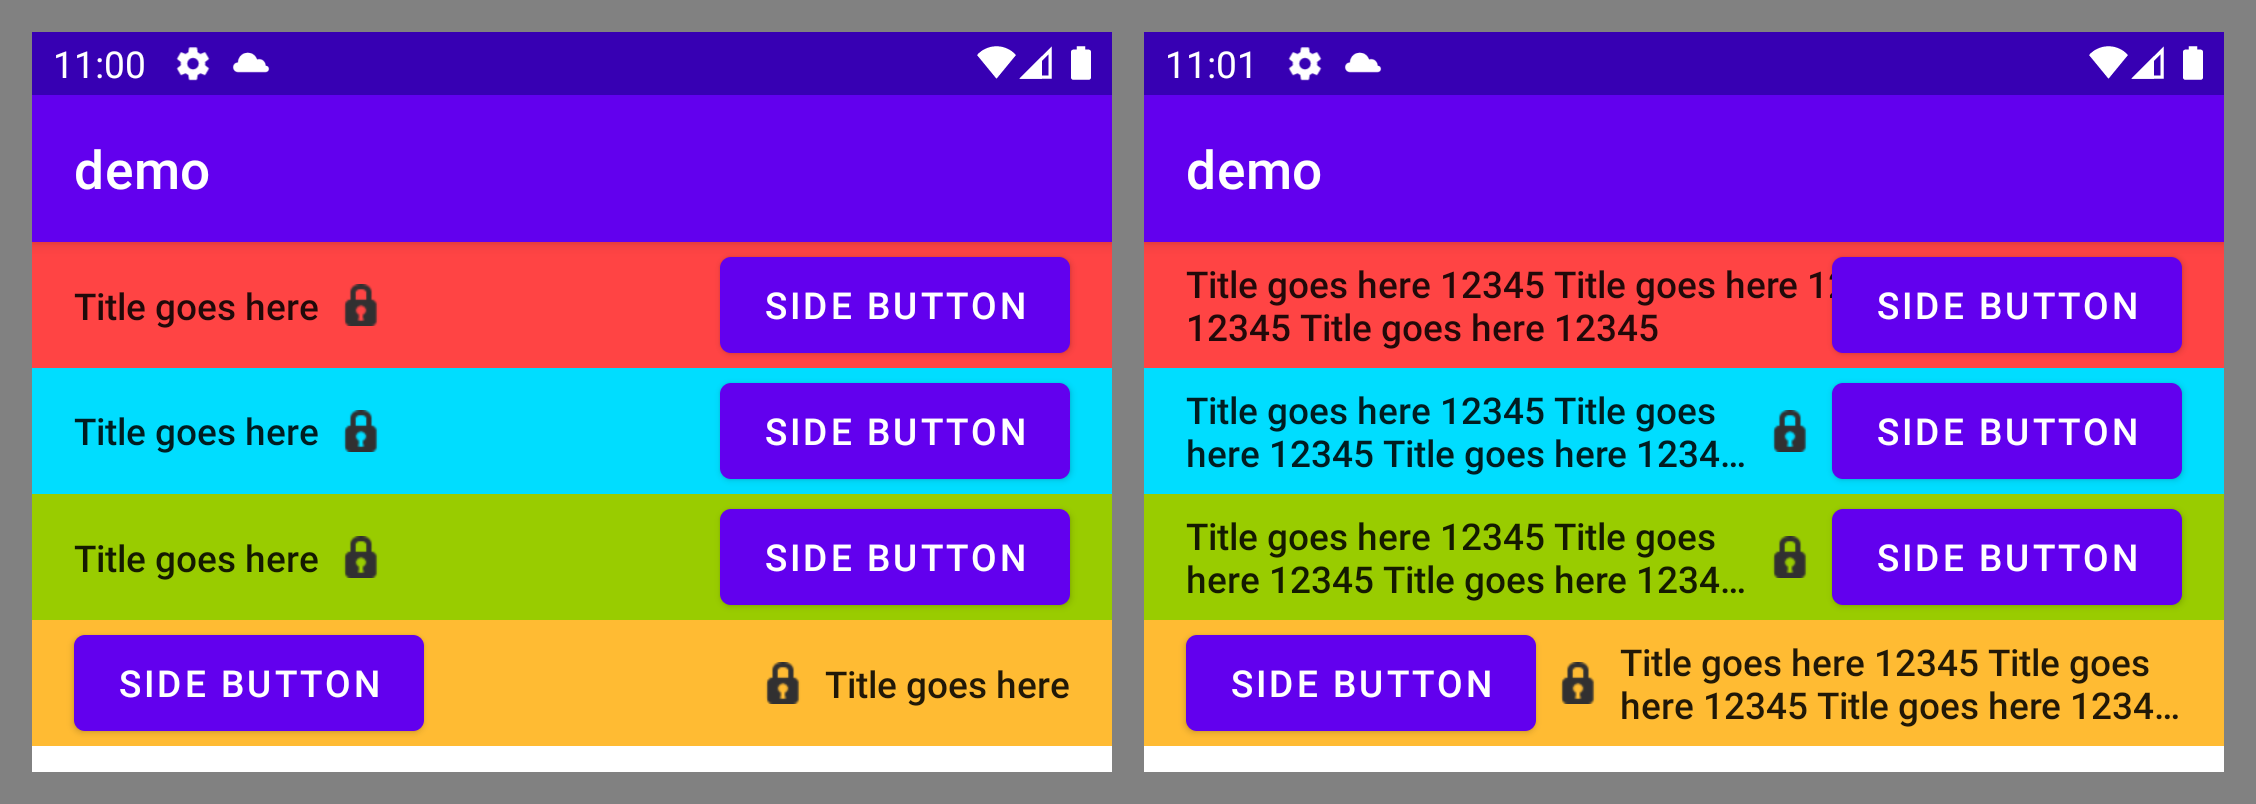
實際效果
下圖示範了上面介紹的方法在實際運行時的效果:
由上至下:
ConstraintLayouthorizontal chainTableLayout加TableRowConstraintLayoutflowConstraintLayoutflow(Button在左邊)
左邊是文字不太長的情況,右邊是文字過長的情況。
完整的 XML layout file 已經放在 Gist。